Task Assignments
Assigning tasks is a fundamental feature that enhances team collaboration by distributing responsibilities among team members or groups. When a task is assigned, it not only delineates responsibilities but also notifies the assignees via email or Slack, ensuring everyone is aware of their duties and facilitating the tracking of task progress.
Types of Task Assignments
Task assignments can be categorized into three types:
- Checklist Task Assignments: Directly assign tasks within specific checklists. These assignments are confined to the originating checklist.
- Template Task Assignments: Assign tasks within a template to designated users or groups. These assignments automatically apply to every instance of the checklist derived from the template.
- Dynamic Task Assignments: Automate task assignments using predefined rules that bind tasks to various system elements.
This article focuses on Template Task Assignments, with a brief overview of Dynamic Task Assignments.
Benefits of Assigning Tasks in a Template vs. Assigning in a Checklist
When tasks are assigned within a template, they automatically apply to every checklist created from that template. This uniformity ensures that all processes using the template follow the same procedures and task distribution, enhancing consistency and reducing the chance of errors or missed tasks that can happen with manual assignments in individual checklists.
How to Assign a Task in a Template
- Access the Template: Open the template and navigate to the task list.
- Select the Task: Click on the task you wish to assign.
- Assign the Task:
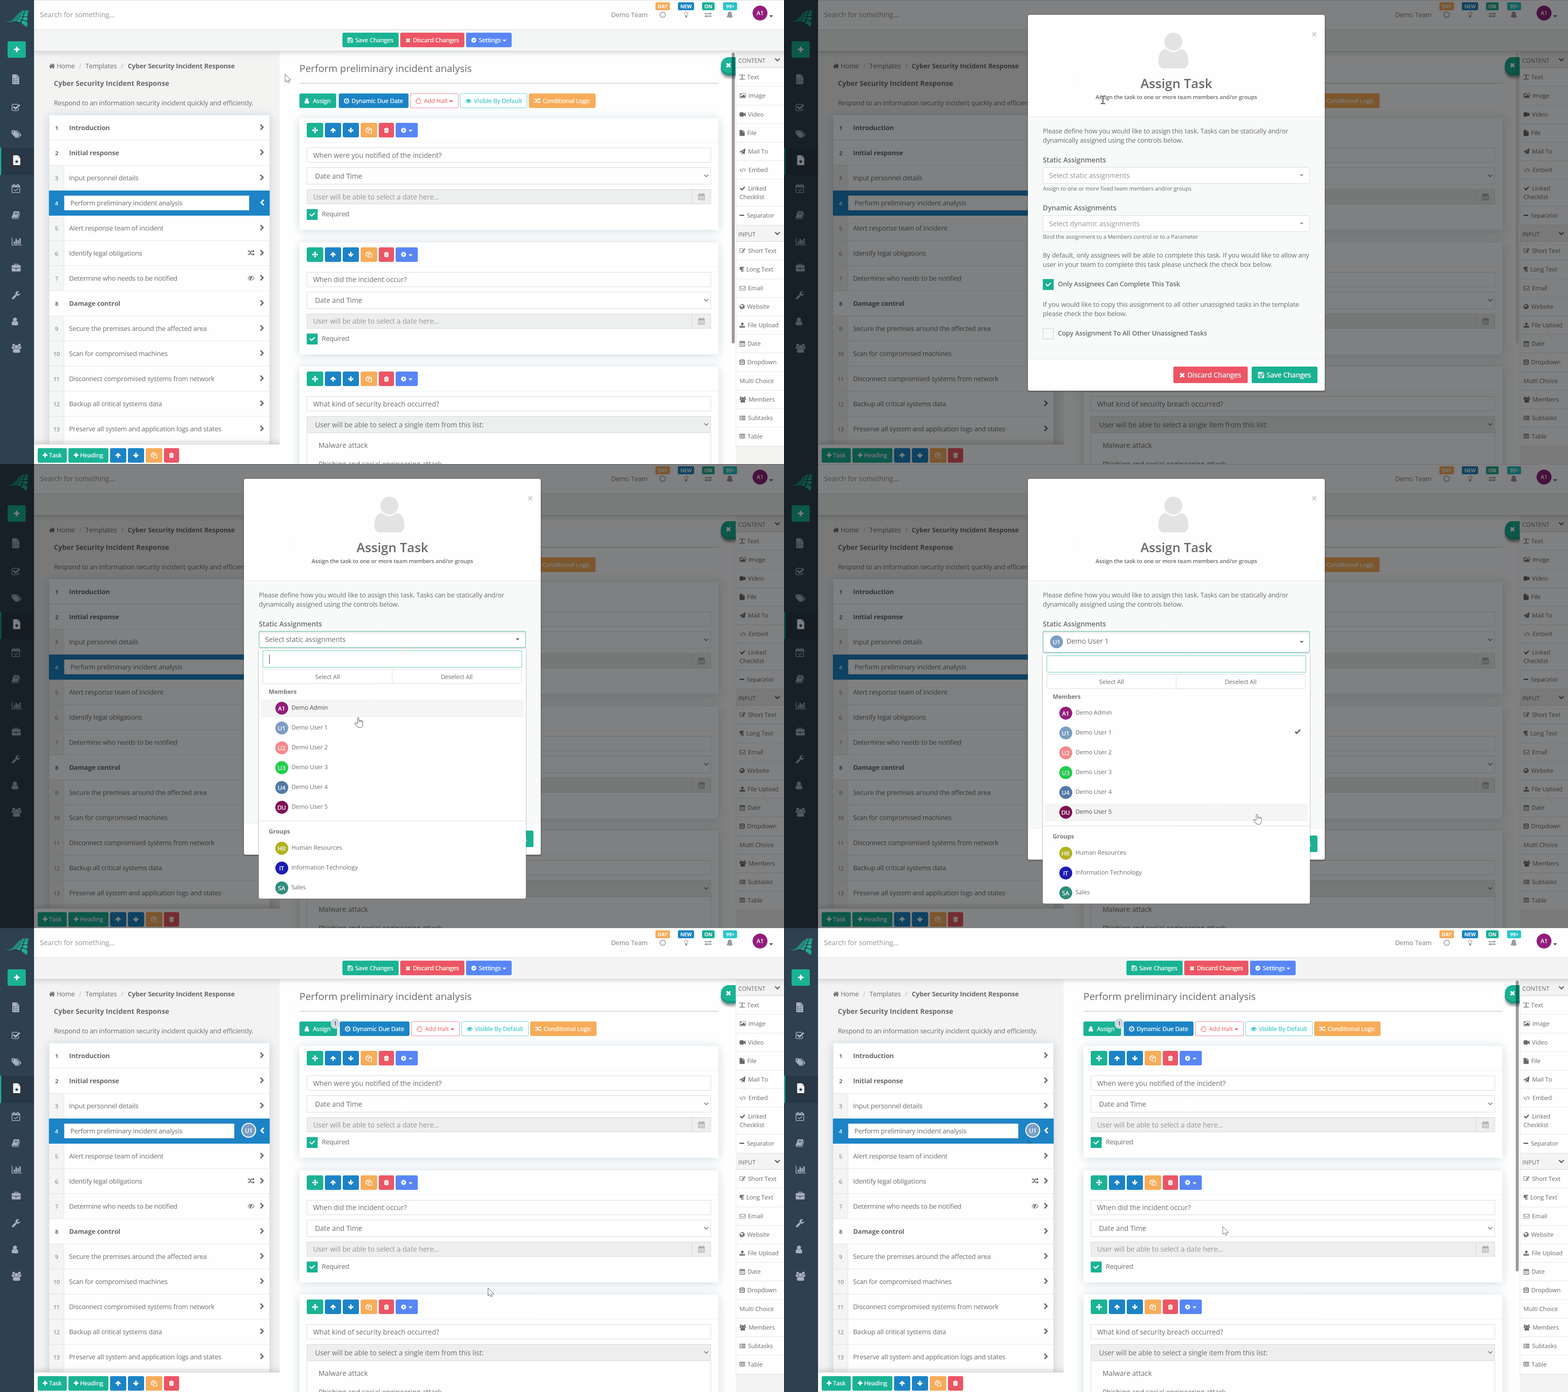
- Click the 'Assign' button located in the toolbar at the top of the task content area.
- A popup will appear displaying two dropdown lists.
- Click the first dropdown titled 'Static Assignments', which displays a list of users and groups.
- Select the desired users and/or groups by clicking on their names. A tick will appear next to each selected name.
- Set Assignment Restrictions (Optional):
- Below the dropdown, a checkbox titled 'Only Assignees Can Complete This Task' allows you to specify if the task can only be completed by the assignees.
- If checked, the task will be greyed out for non-assignees, making the content inaccessible and the completion checkbox disabled.
- Apply to Other Unassigned Tasks (Optional):
- Below the dropdown, a checkbox titled 'Copy Assignment To All Other Unassigned Tasks' allows you to apply the same assignments to all other unassigned tasks.
- This is useful for assigning in bulk. Other tasks with existing assignments will not be affected.
- Save Changes: Click the 'Save Changes' button to save the assignments and close the popup.

Dynamic Assignments in Templates
In addition to static assignments, tasks can also be dynamically assigned using the second dropdown list in the popup, titled 'Dynamic Assignments'. This feature allows tasks to be automatically assigned based on predefined rules that consider various system elements. For more details on setting up and using dynamic assignments, please read the knowledge base article on Dynamic Task Assignments.
How to Unassign a Task
Follow the same steps as assigning a task, but deselect the users or groups in the dropdown to remove the tick next to their names.
How Assignments Are Displayed
Assignments are shown next to the task name in the tasks list.
- Single User or Group: The assignee's avatar is displayed.

- Multiple Users or Groups: A multi-avatar icon is shown, with the number of assignees indicated next to it.

Hovering over any avatar will display detailed information about the assignees, including the type of assignment (exclusive or normal) and their names.